Thursday, May 31, 2012

Chocolate Cupcakes With Chocolate Dipped Meringue Frosting

Finished Cupcakes in Cupcake carrier ready to go to school!


Chocolate Cupcakes
3 ounces unsweetened chocolate, chopped
1 cup all-purpose flour
1/2 teaspoon baking powder
1/2 teaspoon baking soda
1/4 teaspoon salt
1/2 cup (1 stick) unsalted butter, softened
1 1/4 cups sugar
2 large eggs
1 teaspoon vanilla extract
1/2 cup sour cream


1. Preheat oven to 350 degrees with rack in center. Prepare the batter: Place chocolate in a medium heatproof bowl, and set it over a medium saucepan of barely simmering water; stir chocolate until melted and smooth. Remove bowl from heat, and set aside to cool slightly.
Heating Chocolate in a double-boiler


2. Meanwhile, whisk together flour, baking powder, baking soda, and salt in a medium bowl; set aside.


3. In the bowl of an electric mixer fitted with the paddle attachment, cream butter and sugar on medium speed, scraping sides of bowl as needed, until light and fluffy. On low speed, mix in melted chocolate. Increase speed to medium, and add eggs, one at a time, mixing well after each addition. Add vanilla, and beat until mixture is creamy and color has lightened slightly, about 1 minute. Mix in sour cream. On low speed, add half of reserved flour mixture, beating until just incorporated. Mix in 1/2 cup water. Add remaining flour mixture, and mix until just incorporated.


4. Line a cupcake pan with paper liners. Fill each liner with enough batter to come 1/8 inch from top, about 1/3 cup. Bake, rotating pans halfway through, until tops are firm and a cake tester inserted in the center comes out clean, about 20 minutes. Transfer cupcakes to a wire rack to cool in pan for 10 minutes.


5. Use a small knife to loosen any tops stuck to the pan. Carefully invert cupcakes onto the wire rack. Turn cupcakes right side up, and let cool completely.


Meringue
1 3/4 cups sugar
3 large egg whites
1/4 teaspoon cream of tartar
1 teaspoon vanilla extract
1/2 teaspoon almond extract


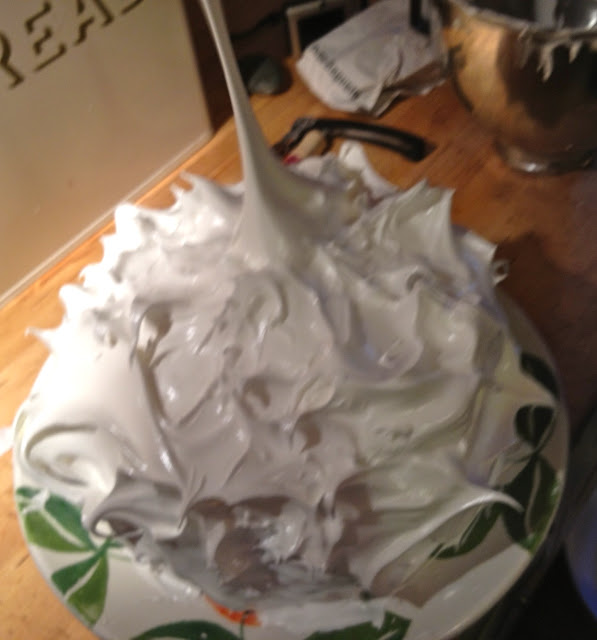
1. Prepare the frosting: In a large heatproof bowl, combine sugar, 1/4 cup water, egg whites, and cream of tartar. Using a handheld electric mixer, beat on high speed until foamy, about 1 minute. Set bowl over a pan of barely simmering water. Beat on high speed until frosting forms stiff peaks, about 12 minutes; frosting should register 160 degrees.on a candy thermometer. Remove from heat; stir in vanilla and almond extracts, and beat for 2 minutes more until frosting thickens.
Notes: Many of the recipes I have tried on this blog have included making a meringue and never have they called for a handheld mixer. I don't own one, so I adapted this recipe by making meringue in the way I have in previous recipes. First I combined the sugar and egg whites and cream of tartar in a bowl over water, then I heated it until it reached 160 degrees. Then I beat the egg white mixture in a standing mixer for 12 min. MAKE SURE that before you take the egg white sugar mixture off of the stove, that the sugar is completely dissolved, or else the meringue will be grainy in texture.


2. Transfer frosting to a large pastry bag fitted with a 1/2-inch plain pastry tip. Leaving a 1/8-inch border on each cupcake, pipe a spiral of frosting into a 2-inch-high cone shape, using about 1/2 cup of frosting per cupcake. Transfer cupcakes to a baking sheet, and refrigerate while preparing the chocolate coating.
Meringue piped on cupcakes! 


Chocolate Coating 
2 cups chopped (about 12 ounces) semisweet chocolate
3 tablespoons canola or vegetable oil


1. Prepare the chocolate coating: Combine chocolate and oil in a medium heat-proof bowl set over a medium saucepan of barely simmering water; stir until melted and smooth. Transfer to a small bowl, and let cool about 15 minutes.


2. Holding each cupcake by its bottom, dip cupcake in the chocolate to coat frosting, allowing excess to drip off. Transfer to a baking sheet fitted with a wire rack. Spoon more coating around edge of cupcake and any exposed frosting; none of the frosting should show. Let cupcakes stand at room temperature 15 minutes.
Dipping Cupcake in chocolate


Letting excess  chocolate drip off.
Cupcake covered in chocolate! 
Notes: I found that some of the meringue would drip into the chocolate when dipping the cupcakes in. I think it was due to the meringue not being cold enough. I would suggest refrigerating the cupcakes with meringue for at least 20-30 minutes before dipping them into the chocolate so that the meringue maintains is height and shape when dipping it into the chocolate. 
3. Place cupcakes on a serving platter or baking sheet, and refrigerate for 30 minutes to let coating set. Cover, and refrigerate for 2 hours more. Serve cold. Cupcakes can be refrigerated for up to 3 days.


4. Use the Extra chocolate from dipping to make chocolate covered strawberries! 


(Recipe adapted from Martha Stewart)

Tuesday, May 22, 2012

Vanilla Bean Coconut Cupcakes with Vanilla Bean Coconut frosting


cupcakes
 
2 cups all purpose flour
2 1/4 teaspoons baking powder
1/2 teaspoon salt
3/4 cup (1 1/2 sticks) unsalted butter, room temperature
1 1/3 cups sugar
3 large eggs
Seeds scraped from 1 split vanilla bean or 1 1/2 teaspoons vanilla extract
1 cup reduced coconut milk (see above), room temperature

Preparation
reduced coconut milk

Bring coconut milk to boil in large deep saucepan over medium-high heat (coconut milk will boil up high in pan). Reduce heat to medium-low; boil until reduced to 1 1/2 cups, stirring occasionally, 25 to 30 minutes. Remove from heat; cool completely. Transfer to small bowl. Cover; chill (coconut milk will settle slightly as it cools).  Can be made 2 days ahead. Keep chilled.


1. Position rack in center of oven; preheat to 350°F. Line eighteen 1/3-cup muffin cups with paper liners. Whisk flour, baking powder, and salt in medium bowl. Using electric mixer, beat butter in large bowl until smooth. Add sugar; beat on medium-high speed until well blended, about 2 minutes. Add 2 eggs, 1 at a time, beating well after each addition and occasionally scraping down sides of bowl. Beat in seeds from vanilla bean and remaining egg.
Vanilla Bean Seeds being added to batter.
Add half of flour mixture; mix on low speed just until blended. Add 1 cup reduced coconut milk; mix just until blended. Add remaining flour mixture; mix on low speed just until blended. Divide batter among muffin cups.
 
2.Bake cupcakes until tops spring back when gently touched and tester inserted into center comes out clean, about 20 minutes. Transfer cupcakes in pans to rack; cool 10 minutes. Carefully remove cupcakes from pans and cool completely on rack.
 
frosting
 
1 cup (2 sticks) unsalted butter, room temperature
2 1/2 cups powdered sugar
1/3 cup reduced coconut milk (see above), room temperature
Seeds scraped from 1 split vanilla bean or 1 1/2 teaspoons vanilla extract
1/8 teaspoon salt
1 1/2 cups sweetened flaked coconut, lightly toasted (for garnish)


1. Using electric mixer, beat butter in large bowl until smooth. Add sugar, 1/3 cup reduced coconut milk, seeds from vanilla bean, and salt. Beat on medium-low speed until blended, scraping down sides of bowl. Increase to medium-high and beat until light and fluffy.
 
2. Using pastry bag fitted with large star tip, pipe frosting onto cooled cupcakes. (Alternatively, top each cupcake with 2 tablespoons frosting. Using small offset spatula, swirl frosting over top of cupcakes, leaving 1/2-inch plain border.) Sprinkle with coconut.
Toasted Coconut Sprinkled with sugar for garnish. 
(Recipe adapted from bonappetit.com) 

Devils Food Cake Cupcakes with Esspresso Buttercream

Cake
 4 ounces unsweetened chocolate
1/4 cup Dutch-processed cocoa
1 1/4 cups boiling water
3/4 cup unbleached all-purpose flour
3/4 cup plain cake flour
1 teaspoon baking soda
1/4 teaspoon salt
16 tablespoons (2 sticks) unsalted butter, softened but still cool
1 1/2 cups packed dark brown sugar
3 large eggs, at a room temperature
1/2 cup sour cream
1 teaspoon vanilla extract

NOTES: Before trying this recipe, I would suggest right off the bat making a cake rather than cupcakes. I've made this recipe as a cake before and it came out wonderfully. In this recipe I tried to make cupcakes with this devil's food cake recipe and they shrunk in the oven, pulling away from the cupcake wrappers. They still tasted great, but they weren't as visually appealing as I would have like them to be, for this reason I would suggest making a cake!

1. Adjust the oven racks to the upper and lower positions; heat the oven to 350 degrees. Grease 3 8 inch pans (or 2 nine inch pans) and line the bottoms of the pans with parchment paper. Combine the chocolate and cocoa in a medium bowl; pour the boiling water over and whisk until smooth.
Mixing Cocoa Powder and boiling water.
 Sift together the flours, baking soda, and salt into a bowl and set aside.

2. Beat the butter in the bowl of a standing mixer at medium-high speed until creamy, about 1 minute. Add the brown sugar and beat at high speed until light and fluffy, about 3 minutes. Stop the mixer and scrape down the sides of the bowl with a rubber spatula. With the mixer at medium-high speed, add the eggs 1 at a time, beating 30 seconds after each addition. Reduce the speed to medium; add add the sour cream and vanilla and beat until combined, about 10 seconds. Stop the mixer and scrape down the bowl.  With the mixer at low speed, add about one third of the flour mixture, followed by about half of the chocolate mixture. Repeat ending with the flour mixture; beat until just combined about 15 seconds. Do not over beat. Remove the bowl from the mixer; scrape the sides of the bowl with a rubber spatula and stir gently to thoroughly combine.
3. Divide the batter among  the cake pans and smooth batter with a rubber spatula.
Batter Scooped into Cupcake tins. 
 Place 2 pans on the lower-middle rack and 1 on the upper-middle rack. Bake the cakes until a toothpick or skewer inserted in the center comes out clean, 20 to 23 minutes. Run a knife around each pan perimeter to loosen. Invert each cake onto a large plate; peel off parchment paper and re-invert onto a rack. Cool completely.
4. Assemble and frost the cake. Cut the cake into slices and serve!

Espresso Buttercream Frosting:

4 Large eggs
1 cup sugar
2 table spoons vanilla extract
Pinch of salt
1 pound (4 sticks) unsalted butter, softened but still cool, each stick cut into quarters
3 table spoons of espresso (can be instant espresso dissolved in hot water)

1. Combine the eggs, sugar, vanilla, and salt in the bowl of a standing mixer; place the bowl over a pan of simmering water. Whisking gently but constantly, heat the mixture until it is thin and foamy and registers 160 degrees on an instant read, or candy thermometer.
2. Beat the egg mixture at medium high speed until light, airy, and cooled to room temperature, about 5 minutes. Reduce the speed to medium and add the butter, one piece at a time. (After adding half the butter, the buttercream may look curdled; it will smooth out with additional butter.) Once all the butter is added, increase the speed to high and beat 1 minute until light, fluffy, and thoroughly combined. Add espresso, and mix until combined. (The buttercream can be covered and refrigerated up to 5 days.)
(Recipes adapted from baking illustrated)

NOTES:
The frosting is delicious! I think it is one of my favorite frosting recipes I have made! The consistency is a little more liquidy than I would have liked, so I might suggest reducing the amount of espresso. However, the consistency wasn't really a problem for me, especially since the flavor of the espresso was so delicious!

Tuesday, May 15, 2012

Lemon Meringue Cake

Finished Cake

Spreading lemon curd on cake layers


Basic layer of meringue on cake (You want the most on the top of the cake)

Forming Peaks in the meringue with a spatula. (Sorry for the poor quality photo)
Using a handheld torch to brown the meringue

  • Cake
  • 2 sticks (1/2 pound) unsalted butter, room temperature, plus more for pans
  • 3 cups all-purpose flour, plus more for pans
  • 1 tablespoon baking powder
  • 1/2 teaspoon salt
  • 2 cups sugar
  • 5 large eggs
  • 1 teaspoon pure vanilla extract
  • 1 teaspoon finely grated lemon zest
  • 1 cup milk
  • 1 1/4 cups Lemon Curd


  1. Preheat the oven to 350 degrees. Butter two 9-inch round cake pans. Flour pans, tapping out excess; set aside. In a medium bowl sift together the flour, baking powder, and salt; set aside.
  2. In the bowl of an electric mixer fitted with the paddle attachment, beat together the butter and sugar until light and fluffy, about 2 minutes. Add the eggs, one at a time, beating to combine after each addition. Beat in the vanilla and the lemon zest. Add the flour mixture, alternating with the milk, beginning and ending with the flour mixture. Beat until just combined.
  3. Divide batter between prepared pans. Bake until a cake tester inserted in the center comes out clean, 30 to 40 minutes. Remove from oven, and let stand in pans until cool, about 1 1/2 hours.
  4. Remove cakes from pans. Using a serrated knife, trim tops of cakes. Slice each cake horizontally into 3 layers. Place one layer on a serving platter. Spread with 1/4 cup lemon curd.  Top with second layer of cake. Spread with 1/4 cup curd. Repeat with remaining cake and curd, finishing with a layer of cake. Transfer to refrigerator until ready to use, at least 2 hours.
  5. Remove cake from refrigerator. Spread a thin even layer of meringue over sides of cake. Mound the remaining meringue on top of cake. Use a handheld torch to brown meringue.

Meringue Frosting:
2 cups sugar
  • 8 large egg whites (1 cup)
  • 3 lemons juiced
  • 1. Combine the sugar, egg whites, and lemon juice in the bowl of an electric mixer set over a pan of simmering water. Whisk until sugar is dissolved, about 3 minutes.
  • 2. Transfer bowl to the mixer stand fitted with the whisk attachment. Beat on medium speed for 10 minutes. Increase to high speed and beat until stiff glossy peaks form, 10 to 15 minutes more.
(adapted from marthastewart.com)

Notes:
I made two recipes of the meringue as Martha Suggested and found that I had waay more than necessary even for a heavy layer of meringue on top of the cake. I think only one batch is necessary. Additionally, when I made this cake I did not pay attention to how much lemon curd I was using in-between each layer, but I know it was less than the 1/4th cup that this recipe calls for. I found that the cake was a little dry and would suggest really using 1/4th cup between each layer to add extra moisture and lemon flavor. 

Wednesday, May 9, 2012

Cheese Souffle

Cheese Souffle

Makes 4
3 tablespoons unsalted butter plus more, room temperature, for ramekins
4 tablespoons finely grated Parmesan, divided
3 tablespoons all-purpose flour
1 cup cold whole milk
1 cup grated Gruyère, divided
Pinch of freshly grated nutmeg
Kosher salt, freshly ground pepper
4 large eggs, yolks and whites separated
1/4 teaspoon xanthan gum (optional) 
Four 8-ounce ramekins

1.Preheat oven to 400°. Brush ramekins with butter and place on a foil-lined baking sheet; sprinkle ramekins with 2 Tbsp. Parmesan (total). Chill for 20 minutes or, covered, up to 1 day.


2. Melt 3 Tbsp. butter in a small saucepan over medium heat. Add flour; whisk constantly for 30 seconds. Gradually whisk in milk; increase heat and bring to a boil, whisking constantly. Add remaining 2 Tbsp. Parmesan and 1/2 cup Gruyère; stir until melted. Add nutmeg and season with salt and pepper. Transfer béchamel to a medium bowl and cover with plastic wrap; set aside.


3. Place egg whites in a large bowl. Stir in a pinch of salt and xanthan gum, if using. Using an electric mixer, beat egg whites until firm but not stiff, 3–4 minutes.


4. Stir egg yolks into béchamel. Gently stir in 1/4 of beaten egg whites to loosen béchamel base, then gently fold in remaining egg whites just to combine, taking care not to deflate.
5. Divide mixture among ramekins; sprinkle with 1/2 cup Gruyère;. Run your finger around inside lip of ramekins, cleaning edges.
Souffles covered with cheese before going into the oven.
 Bake until soufflés rise, centers are set, and cheese is golden brown, 18–22 minutes. Serve immediately.
Souffles out of the oven!

Notes: I used 10 oz ramekins instead of 8 ounce and the souffle's still turned out well. I also did not use xanthan gum because I could not find any at the store.
The bechamel was really thick and gloppy when I made it, I was worried about the consistency weighing down the souffle, but it all worked out and the souffle's rose, but not higher than the rim of the ramekins.
(recipe adapted from bonappetit.com)

Tuesday, May 8, 2012

Double Chocolate Chip Cookies

Yield Makes about 3 dozen

Ingredients
1 cup all-purpose flour
1/2 cup unsweetened Dutch-process cocoa powder
1/2 teaspoon baking soda
1/2 teaspoon salt
8 ounces good-quality milk chocolate, 4 ounces coarsely chopped, 4 ounces cut into 1/4-inch chunks (I just used chocolate chips for all the chocolate aspects of these cookies besides the cocoa powder)
1 stick (8 tablespoons) unsalted butter
1 1/2 cups sugar
2 large eggs
1 teaspoon pure vanilla extract

1. Preheat oven to 325 degrees. Whisk together flour, cocoa powder, baking soda, and salt in a medium bowl; set aside. Melt coarsely chopped chocolate with the butter in a small heatproof bowl set over a pan of simmering water.

2. Transfer chocolate mixture to the bowl of an electric mixer fitted with the paddle attachment. Add sugar, eggs, and vanilla; mix on medium speed until combined. Reduce speed to low; gradually mix in flour mixture. Fold in chocolate chunks.

3. Scoop batter using a 1 1/2-inch ice cream scoop; place 2 inches apart on parchment-lined baking sheets. Bake until cookies are flat and surfaces begin to crack, about 15 minutes. Transfer on parchment to wire racks. Let cool 5 minutes. Cookies can be stored in an airtight container at room temperature for up to 3 days.

Notes: These cookies were really delicious and chocolatey! I would suggest using baking sugar for these cookies, because baking sugar is very fine. I used turbino sugar, which is bigger than baking sugar and the sugar didn't completely mix into the batter.

(recipe adapted from marthastewart.com)

Monday, May 7, 2012

Macaroons with Raspberry Jam and Rose Buttercream

 Makes about 3 dozen
(although every time I have tried to make these cookies I end up with about 1 dozen cookies that are acceptable to use)

Notes: I would not suggest making these cookies if you are baking for a large number of people, or in general. I plan to try a different recipe for macaroons. The rose-buttercream however I thouhgt was really delicious and I would make it again. 

Macaroons:
2 cups powdered sugar
1 cup (lightly packed) sifted almond flour, or 3/4 cup sifted almond flour and 1/4 cup sifted hazelnut flour (sifted, then measured; any coarse particles reserved for another use)
1/2 cup (scant) egg whites (from about 3 large eggs)
2 tablespoons plus 1/2 teaspoon sugar 

1. Line 2 large baking sheets with parchment. 
2. Sift powdered sugar, almond flour, and hazelnut flour (if using) into large bowl. 
3. Using electric mixer, beat egg whites, sugar, and pinch of salt in medium bowl until medium peaks form. Add egg white mixture to almond mixture; fold to incorporate.
Folding Almond flour into whipped egg whites
4. Working in 2 batches, fill pastry bag fitted with 1/4-inch-diameter plain pastry tip with batter (batter will be thin and will drip from bag). Pipe batter in 11/4-inch rounds on baking sheets, spacing 1 inch apart (cookies will spread slightly).
These aren't perfect do to the liquidiness of the batter, however these are about the size you want to pipe the cookies.
5. Let rest on sheets at room temperature 20 minutes.
Notes: The cookie batter is very liquidy, so I would suggest piping a quarter sized circle for each cookie, with an inch between each cookie. 

1. Position 1 rack in top third and 1 rack in bottom third of oven; preheat to 375°F.
2. Bake cookies 5 minutes. Reduce oven temperature to 325°F. Continue to bake cookies until puffed and golden on top, about 10 minutes, reversing sheets after 5 minutes.
3. Cool cookies on sheets on rack. Carefully peel cookies from parchment.

Notes: These cookies are very tasty, but very flimsy. They came out of the oven very airy and the tops of many of the cookies separated from the bottoms, when I tried to transfer them to a wire wrack. I could only use about 1 baking sheet worth of cookies each time I made this recipe. I


Filling:
4 cups frozen raspberries (about 15 ounces; do not thaw)
1 cup plus 6 tablespoons sugar, divided
1/4 cup egg whites (from about 2 large eggs), room temperature
10 tablespoons (11/4 sticks) unsalted butter, cut into 1-inch pieces, room temperature
1/4 teaspoon (generous) rose water

Raspberry Jam:
1. Bring raspberries and 1 cup sugar to boil in large saucepan over high heat, stirring until sugar dissolves. 
2. Cook until berries are soft, juices thicken, and mixture measures about 11/2 cups, stirring frequently, 7 to 9 minutes. 
3. Measure 1/2 cup mixture; strain into small bowl. Cool strained jam and jam with seeds separately.
Straining the Jam
Notes: It is not necessary to make do this step if you would like to save time and effort. You can simply just buy a jar of seedless raspberry jam and a jar of raspberry jam with seeds, instead of making your own.


Raspberry-Rose Buttercream:
1. Combine egg whites, 6 tablespoons sugar, and 1/4 teaspoon salt in bowl of heavy-duty stand mixer. Set bowl over large saucepan of simmering water. Heat until candy thermometer inserted into mixture registers 140°F, stirring often, 3 to 4 minutes. 
2. Using whisk attachment, beat egg white mixture at high speed until stiff meringue forms and mixture is at room temperature, 5 to 6 minutes. 
3. With mixer running, add butter, 1 piece at a time, beating until each piece is incorporated before adding next. 
4. Beat in rose water. Add 3 tablespoons seedless jam, 1 tablespoon at a time, beating to blend well after each addition. 
Notes:
I made a version of this Buttercream, with out the raspberry jam and I found it to an all over better consistency than the buttercream with raspberry jam. I also preferred the taste of the just rose buttercream.
 If buttercream looks broken or curdled, place bowl over medium heat and whisk 5 to 10 seconds to warm slightly, then remove from heat and beat again on medium speed. Repeat warming and beating as many times as needed until buttercream is smooth.
Filling the cookies:
1. Line rimmed baking sheet with parchment. Using 1/2 teaspoon jam with seeds for each, spread jam over flat side of half of macaroons. 
2. Spoon buttercream into pastry bag fitted with 1/4-inch plain tip. Starting at outer edge of flat sides of remaining macaroons, pipe buttercream over in spiral. Gently press macaroons, jam-filled side down, onto buttercream-coated macaroons. Place on sheet. Cover; chill overnight. 
(This recipe is adapted from bonappetit.com)

Tuesday, May 1, 2012

Churros

Makes about 6 
1 cup water
2 1/2 tablespoons white sugar
1/2 teaspoon salt
2 tablespoons vegetable  oil
1 cup all-purpose flour
2 quarts oil for frying
1/2 cup white sugar, or to taste
1 teaspoon ground cinnamon. 
 1. In a small saucepan over medium heat, combine water, 2 1/2 tablespoons sugar, salt and 2 tablespoons vegetable oil. Bring to a boil and remove from heat. Stir in flour until mixture forms a ball.
2. Heat oil for frying in a  deep-fryer or deep skillet to 375 degrees F (190 degrees C). Pipe strips of dough into hot oil using a pastry bag. Fry until golden; drain on paper towels. 
3. Combine 1/2 cup sugar and cinnamon. Roll drained churros in cinnamon and sugar mixture.
(Recipe adapted from allrecipes.com)
Notes: If you pipe the churros too thick into the oil, the outside will become crispy, but inside will remain very doughy and uncooked. I recommend making the churros not too thick, around 1 inch thick to make sure the inside gets cooked, as well as the outside. Also be very careful when you place the churro dough into the hot oil, I burned myself accidentally during this step.

Monday, April 23, 2012

Homemade Oreos


Chocolate Ice Box Cookies
Makes about 45 cookies
 2 cups unbleached all purpose flour
1/4 cup Dutch processed cocoa powder
1/2 teaspoon salt
16 tablespoons (2 sticks) unsalted butter, softened but cool
3/4 cup granulated sugar
1/2 cup confectioners sugar
2 ounces melted and cooled semisweet chocolate
2 large egg yolks
2 teaspoons vanilla

1. Whisk together the flour, cocoa powder, and salt in a medium bowl; set aside.
2. Either by hand or with an electric mixer, beat the butter and sugars at a medium speed until light and fluffy, 1 to 1 1/2 minutes. Scrape the sides of the bowl with a rubber spatula. Add the yolks, melted chocolate, and vanilla and beat until incorporated, 15 to 20 seconds. Scrape the bowl with a rubber spatula. Add the dry ingredients and mix at a low speed until a dough forms and is thoroughly mixed, about 25 to 30 seconds.
3. The dough will be soft but should not be sticky. If the dough is sticky, chill for 10 to 15 minutes. Divide the dough in half. Working with one half at a time, roll the dough on a clean work surface into a log measuring about 6 inches long and 2 inches thick. Wrap each log in plastic wrap and refrigerate for at least 2 hours, or up to 3 days (Dough can be frozen up to 1 month, wrap logs in plastic and and then foil before freezing).
4. Adjust the oven racks to the upper and lower middle positions. Heat the oven to 325 degrees. Line 2 large baking sheets with parchment paper or spray them with nonstick cooking spray.
5. Unwrap the logs one at a time and with a sharp knife, cut the dough into 1/4 inch thick slices. Place the slices on the prepared baking sheets, spacing them 1/2 to 1 inch apart.
6. Bake until edges begin to brown, about 14 minutes, rotating the baking sheets front to back and top to bottom halfway through the baking sheets for 2 minutes, then transfer to a wire rack with a wide metal spatula.

Filling
12 Oz. White chocolate
1/4 cup Sour Cream

1. Completely melt White Chocolate on a double boiler on the stove.
2. Add in sour cream and stir until combined.
3. Let icing cool, can place in the refrigerator for faster cooling (about 20-30 min).

Filling the Cookies
1. Using a small spoon, add a dollop of frosting to the center of one cookie. (too much filling will cause the Oreos to overflow).
2. place another cookie on top of the cookie with the filling. Gently press the two together.

(Recipe adapted from Baking Illustrated Sandwich cookies.)

Notes: I found that one recipe of filling was waaay more than I needed to fill one recipe of Chocolate cookies. I would suggest either making 2 batches of chocolate ice box cookies or halving the recipe of the filling to avoid having extra.

Friday, April 20, 2012

Lemon/Orange Meringue Swirls

Lemon Meringues

(Recipe from Martha Stewart Living)
Active time: 20 min
Total time: 2 hrs
Makes 25
3 large egg whites, room temperature
3/4 cups sugar
1/2 vanilla bean, seeds scraped
Large pinch of salt
Large pinch of cream of tartar
1 teaspoon finely grated fresh orange OR lemon zest
Gel-paste food coloring, in orange

1. Preheat oven to 200. Combine egg whites and sugar in a heat proof bowl. Add vanilla bean seeds. Set bowl over pot of simmering water, and stir until sugar dissolves and mixture is warm, about 3 minutes. Add Cream of Tartar.
Egg Whites, Sugar and Vanilla in a simmering pot of water

2. Beat with a mixer on medium-high speed until stiff, glossy peaks form and meringue is mostly cooled, about 7 minutes. Beat in zest.
Stiff Meringue

3. Using a small paint brush, paint three vertical stripes of food coloring inside a pastry bag fitted with a 1/2 inch round tip (Ateco #805). Fill bag with meringue and pipe 1 3/4 inch circular shapes (they don't need to be perfect rounds) 2 inches apart on 2 parchment-lined baking sheets. As you finish piping each shape, apply less pressure to pastry bag, and swirl the tip off in a circular motion.
Vertical Stripes of food coloring in piping bag with Meringue
Piping Meringues

4. Bake meringues until crisp on the outside but the soft inside, about 1 hour and 15 minutes. Let cool completely on a wire rack.

Notes: When I made these I thought that 1 teaspoon of zest would be too little, so I added more Orange zest. Although the cookies tasted good, they were too Orangey. If I were to make these again I would stick to the 1 teaspoon. I made the lemon version of these cookies using 1 teaspoon and it had a really delicate yet prominent lemon flavor that was really delicious.
Also When painting the stripes in the pastry bag, I found that painting the stripes too close together resulted in only one swirl in the cookie. Painting them farther apart and even on different sides of the pastry bag give you nicer, more distinct swirls.
This Recipe was really easy to follow and the cookies come out really well. Additionally these cookies can be made in all different flavors by using different zests or extracts.
 I Branched out and tried to make rose meringues substituting lemon/orange zest with half a capfull of rose water. The cookies tasted great. The only issue I noticed with using an extract was the meringue seemed to have a more slightly liquidy texture when piping. If I made these again I would use a little less than a half a capfull of rose water.
Rose Meringues
I painted vertical lines farther apart, and on different sides of the pastry bag for these. The swirls look better.


Tuesday, April 17, 2012

Raspberry Cupcakes with Meyer Lemon Buttercream


Raspberry Cupcakes
 22-24 regular cupcakes /375-350 degree oven

1 cup (2 sticks) unsalted butter, room temperature
2 cups sugar
4 large eggs
2-3/4 cups all-purpose flour
1-1/2 teaspoons baking powder
1/8 teaspoon salt
1 cup milk
2 teaspoons vanilla
1/3 cup raspberry puree
24 raspberries
1. Beat butter on high until soft, about 30 seconds.
2. Add sugar. Beat on medium-high until light and fluffy, about 3 minutes.
3. Add eggs one at a time, beat for 30 seconds between each.
4. Whisk together flour, baking powder, and salt in a bowl. Add to mixer bowl. Add the milk and vanilla. Mix to combine.
5. Puree raspberries in a food processor. Add Puree to the batter and combine.
Raspberry puree in batter
6. Scoop into cupcake papers about half to two-thirds full (depending on whether you want flat or domed cupcakes).
7. Place whole raspberries in the center of the cupcake.
Raspberries in Cupcakes
 8. Bake for 22-25 minutes until a cake tester comes out clean.
Note: These cupcakes tend to rise quite a bit and will overflow if you put too much batter in the cupcake paper. Keep it under two-thirds full. They also tend to pull away from the papers as they cool. It should be minimal if the cupcakes were baked enough and shouldn’t be an issue.
(Recipe adapted from cupcakeblog.com)

Meyer Lemon Buttercream
 2 sticks unsalted butter
3 cups powdered sugar (sifted)
1 teaspoon vanilla
1/2 teaspoon salt
juice of 1 medium sized Meyer lemon

1. Beat butter in the bowl of a standing mixer. Add powdered sugar and beat until combined.
2. Add vanilla and salt. Beat until combined.
3. Add lemon juice and beat until combined.
 Notes: If the buttercream is too soft or liquidy, add 1/2 a cup more of powdered sugar.

Chocolate Salted Caramel Cupcakes


Chocolate Cupcakes
Makes about 14-16
1/2 cup (1 stick) butter, room temp
1-1/4 cups sugar
2 large eggs, room temp
3/4 cup flour
1/2 teaspoon baking powder
1/4 teaspoon baking soda
1/4 teaspoon salt
1/2 cup unsweetened cocoa powder
1/2 cup milk
1 teaspoons vanilla
1/2 bag of semisweet chocolate chips
1. Preheat oven to 375
2. Beat butter until softened. Add sugar and beat until light and fluffy, about 3 minutes. 3. Add eggs, one at a time, beating until well combined.
4. Measure the flour, baking powder, baking soda, salt, and cocoa powder into a small sized bowl and whisk to combine.
5. Measure out the milk and vanilla and stir to combine
6. Add about a third of the dry ingredients to the butter/sugar and beat to combine. Add about a half of the milk/vanilla and beat to combine. Continue adding, alternating between dry and wet and finishing with the dry.
7. Add the chocolate chips.
8. Scoop batter into cupcake cups about 2/3’s full. Turn oven down to 350 degrees and bake cupcakes for about 22-25 minutes or until a cake tester comes out clean.
Scooping batter into Cupcake tins


Notes:
Using high quality cocoa powder will enhance the cupcakes flavor.
One thing you must be careful of is over-filling the cupcake paper. Stick to 2/3’s full and don’t be tempted to squeeze that last bit of batter into one of the papers.
(Recipe adapted from cupcakeblog.com)

Salted Caramel Filling/Buttercream
1 Stick non-salted butter
1 Stick Salted butter
1/2 cup heavy cream
1/2 cup sugar
1 teaspoon sea salt
3 cups powdered sugar
4 table spoons water
1 teaspoon vanilla
1/4 teaspoon salt
1. In a mixer beat butter until soft, slowly add powder sugar and sea salt until well combined.
2. Combine cream and vanilla nd set aside.
3. In a sauce pan combine sugar, salt and water, and heat on medium high without stirring until the mixture is dark amber. Remove from heat and add cream and vanilla mixture, stirring. Let caramel cool for at least 20 minutes.

Caramel heating on stove

4. Take a small pipping back with a metal tip and fill with some of the caramel. Insert tip into the middle of cupcakes and fill Cupcakes with Caramel. (You do not need very much caramel for this step.)
5. Add remaining caramel to the the butter and powdered sugar mixture. Beat to combine. If the buttercream is too soft to frost, put it in the refridgerator for 10-15 minutes, then frost cool cupcakes.
Caramel added to buttercream